
Before moving on to the guide, keep in mind that 2GB is the minimum disk space required to download and install Android Studio – 4GB is what we recommend. Android Studio requires a compatible version of the JDK (Java Development Kit). Unless you’ve recently been coding through Java, chances are you don’t have JDK pre-installed.
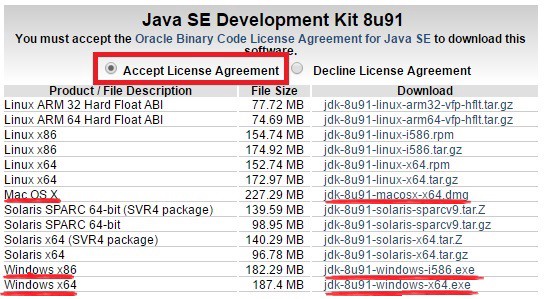
NOTE: Make sure you’ve filled in the bubble highlighted above.
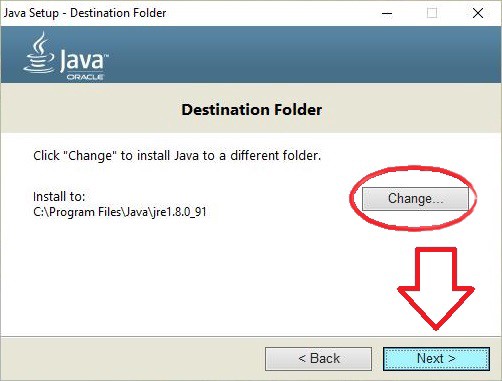
- Once downloaded, proceed through the setup until you see the following
- Either remember the predetermined path or change it to a more prefered location: you’ll need to know where to access these files later on
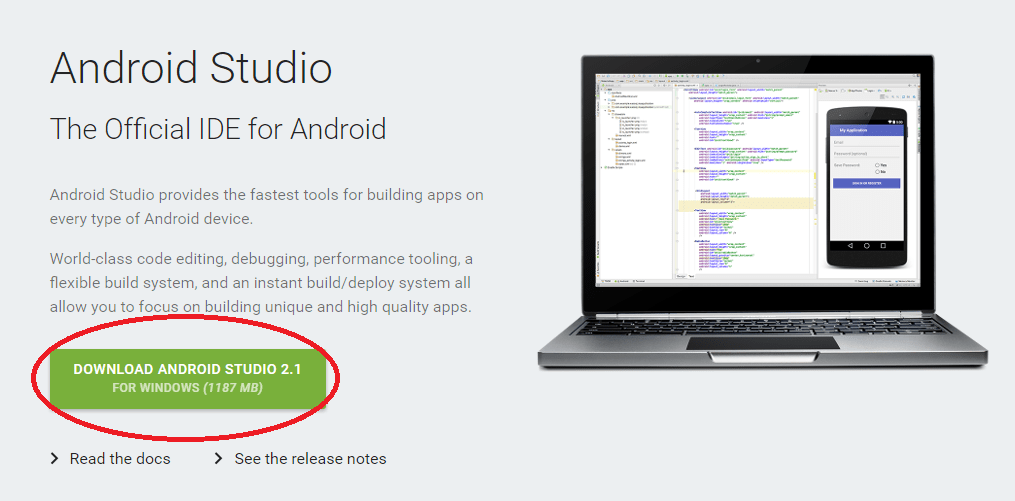
- After successfully installing the newest version of JDK, cilck here and visit Android’s development website to begin downloading Android Studio
NOTE: This method of installation is compatible with both iOS and Windows devices.

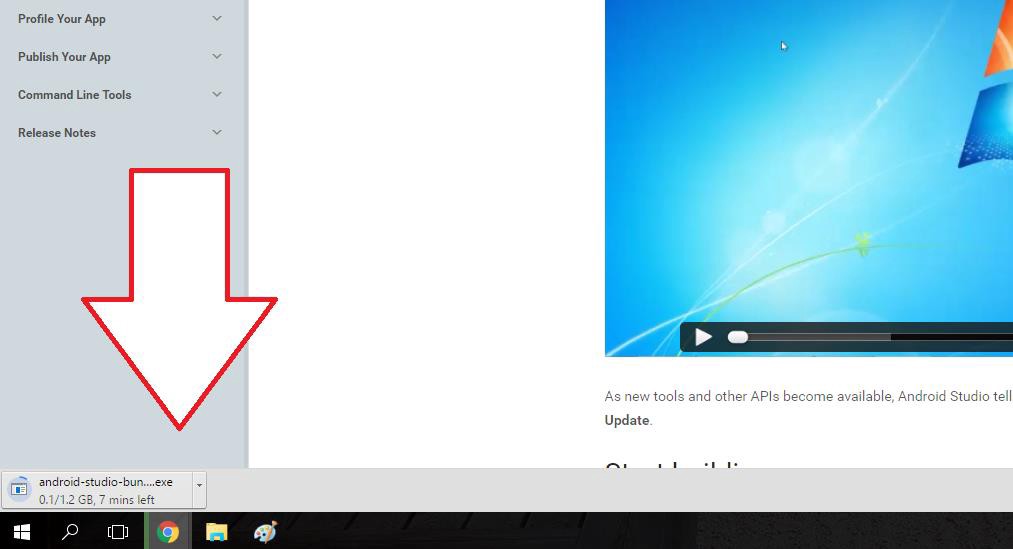
- The download will begin shortly. If done correctly, a prompt should appear at the bottom-left corner of your browser.
- Once downloaded, click the prompt indicated above. Then, click YES on the following window that asks for permission/access to your files. Proceed with the download, making amendments wherever you see fit. After thumbing through several optimization screens, your final installation should be complete.
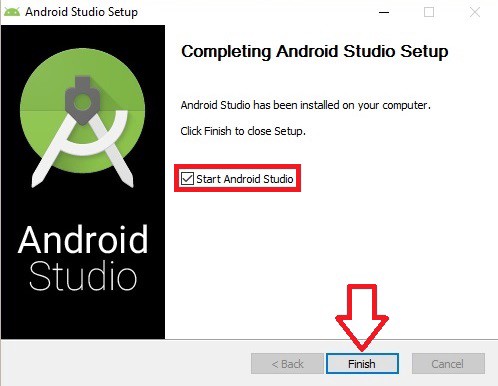
NOTE: You may be required to manually locate and set the path to the JDK files that you downloaded at the beginning of this guide.
Welcome to Android Studio!
Navigating the Setup Wizard
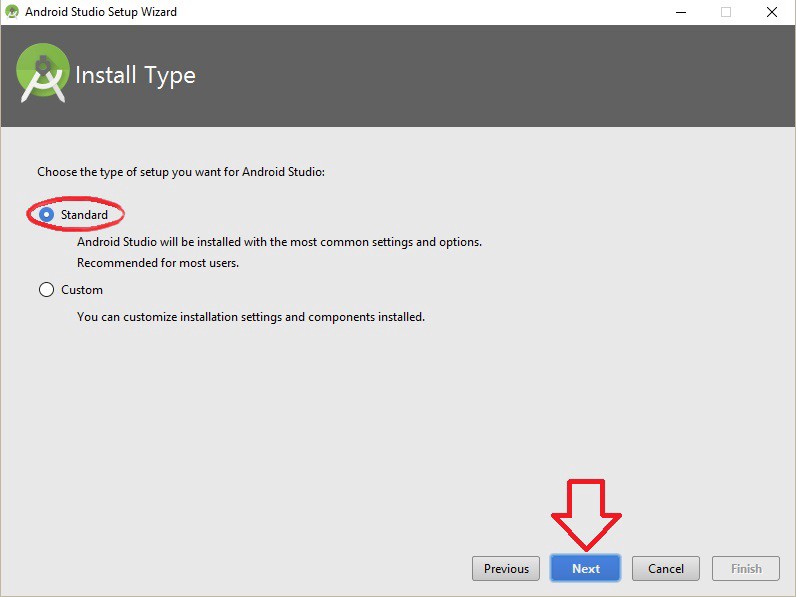
Make sure Standard is selected and hit Next. On the next screen, click Finish and wait for the Wizard to complete.
Setting up your first project
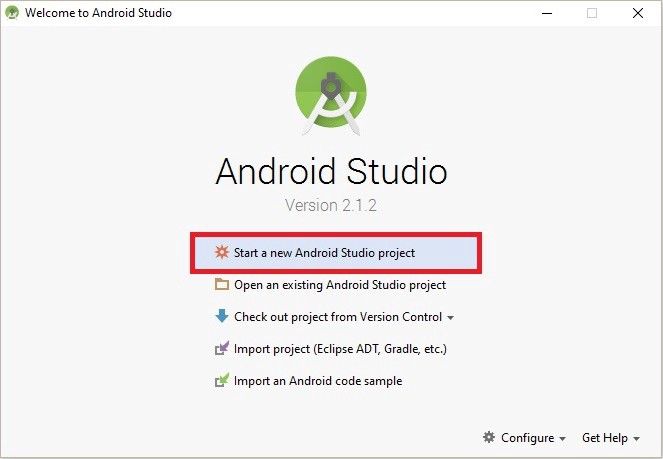
If it isn’t already, open up Android Studio and click on the first prompt to Start a new Android Studio project.
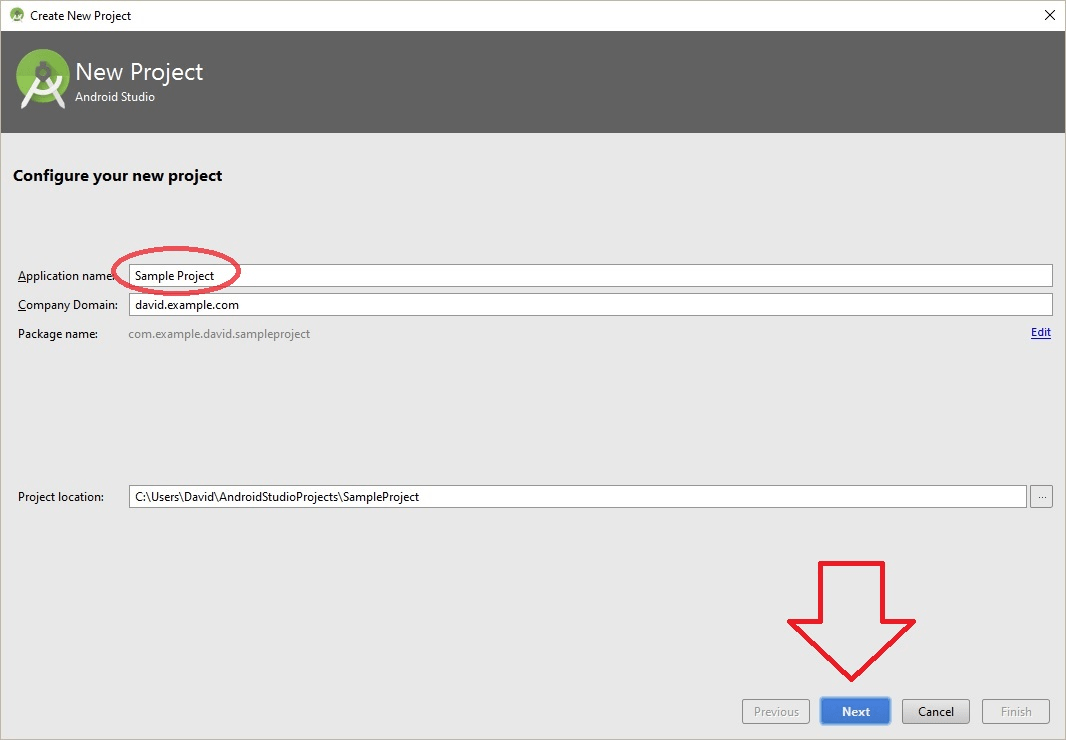
The next upcoming window will ask you to input three of the following specifications:
- Application Name is the name that users will see. For now, label it “Sample Project”;
- Company Domain affects not only the Package Name of this project but also the following projects to come. Android Studio remembers the Company Domain and appends each package name with whatever you submit. Leave this blank or default for now;
- Project Location is the where this and every other subsequent project will be stored;
- The Package Name is the way your project will be identified, and the name is a combination of both your Application Name, Company Domain, and Project Location. However, it can be Edited independently from the Application Name and Company Domain.
Your screen should look similar to this:
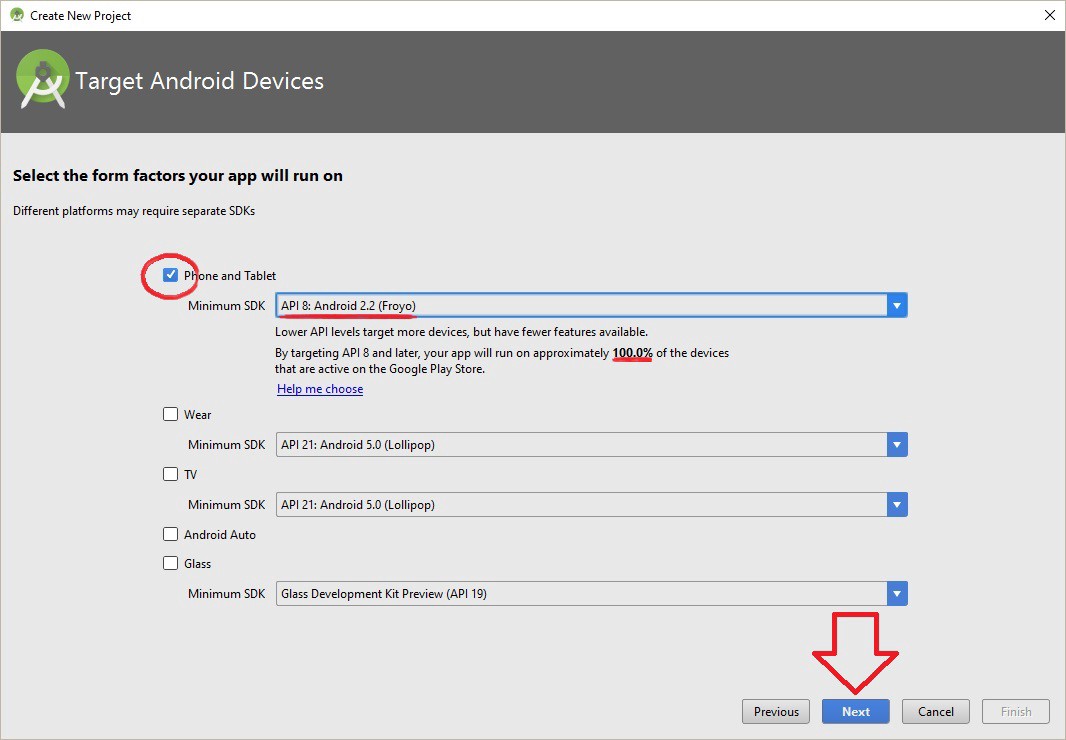
We’ll be focusing on Phone and Tablets, so scan the image below and make sure to exclude all other platforms. Selecting API 8: Android 2.2 (Froyo) beside “Minimum SDK” will ensure that your app is compatible with 100% of devices that are currently active across the Google Play Store
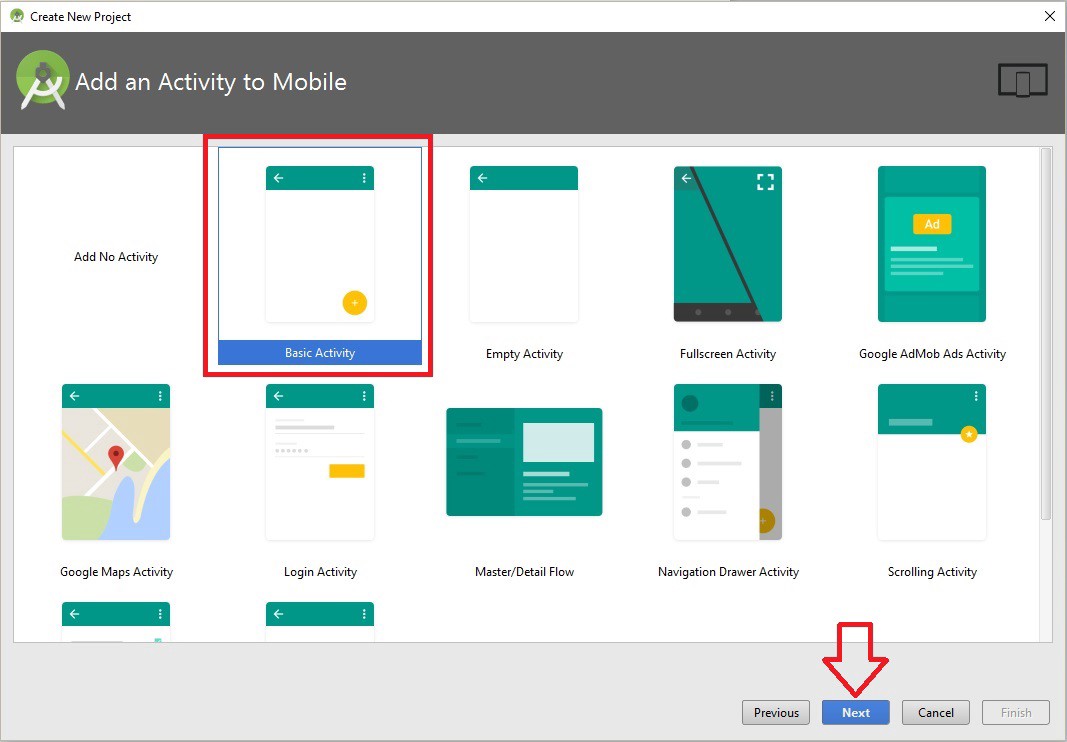
After clicking Next, select the Basic Activity template and click Next again
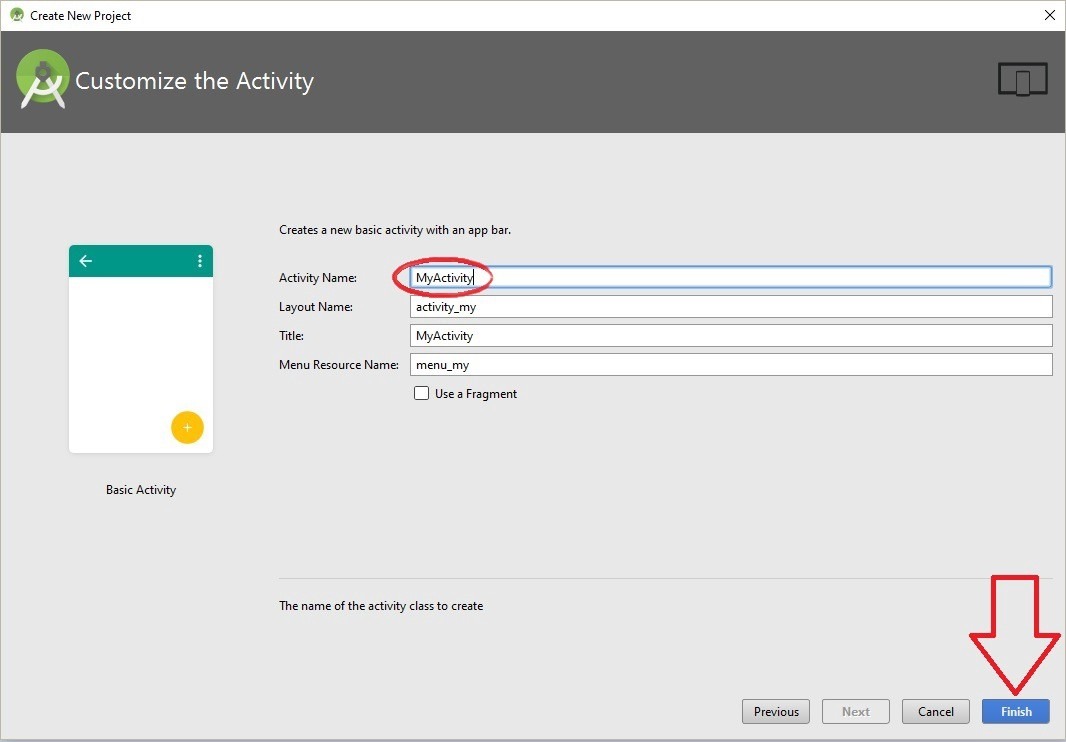
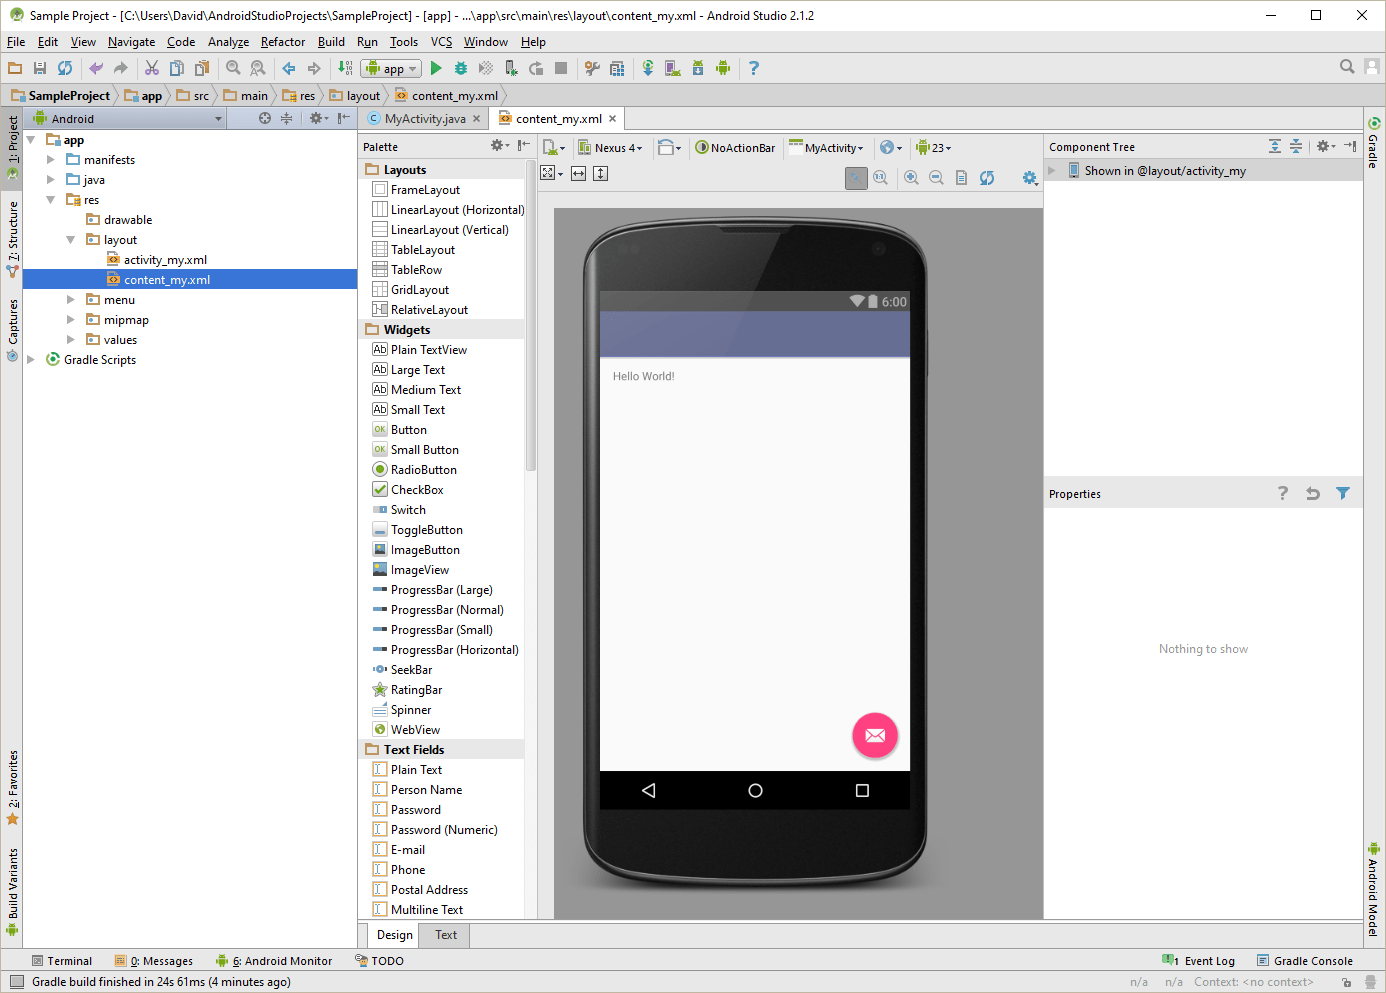
Change the Activity Name to My Activity. Both the Layout Name, Title and Menu Resource Name should change automatically
After clicking Finish, Java will request access to your files yet again; click Allow. Upon initial installation, Android Studio needs to unpack a sizeable amount of data; the UI might need some time before fully deploying. If this is the case, don’t exit App Studio. Find the loading bar located at the bottom/bottom right-hand corner and wait until its completion before continuing any further.
Otherwise, this concludes our guide on getting started with Android Studio!
Related Posts

NOTE: Creating an iOS Developer Account costs approximately $99.00 USD. Creating an Apple Developer account is really simple What’s not, however, is creating an entire app from scratch. Typically, one’s curiosity about the mystery of coding will linger, even if they plan to delegate a team to develop the app. This guide will walk you through all the steps of creating an … Continue reading “Creating iOS Developer Account”

You must have access to an Apple ID account. Xcode and Xcode Command Line Tools are only accessible through this method via Mac and other iOS Devices. NOTE: You must have access to an Apple ID account: to register, click here. For this method, Xcode and Command Line Tools are only accessible via Mac and other iOS Devices. Apple … Continue reading “How To Install Xcode & Start Your First Project”

TestFlight is completely optional, yet completely free for all iOS developers. All data is invaluable to your app's success; hence, aggregating information about apps pre-release has become part of the norm. Two types of beta testing exists internal (closed) and external (open). Last time, we reviewed how to setup External Testing; now, let's focus on … Continue reading “An Intro Into TestFlight: Internal Testing”

Many appreneur success stories have risen from focusing on one platform at the starting gate. Most startups typically jump the gun when they want to make some noise and usually go iOS first, Android second. However, certain circumstances may make it wiser to develop for Android first, or in some cases both platforms at the … Continue reading “Should you develop for both iOS & Android now or focus on one platform?”